How to Install Corel Draw X7

Corel Draw Graphics Suite ,with a fresh look, new must-have tools and major feature enhancements, Corel Draw Graphics Suite X7.5 opens up a world of new creative possibilities. We’ve designed several new workspaces that reflect your natural workflow, so that everything is right where you need it, when you need it. Whether you’re creating graphics and layouts, editing photos or designing websites, this complete suite of graphic design software helps you design your way.


How to Install?

  1. Download and extract files
  2. Install Corel Draw Graphics Suite X7.5 (Trial)
  3. Block your internet connection
  4. Start Corel Draw , In Help Menu Click on Sign In
    another window will open click on Already Purchased (bottom)
  5. Use XFORCE to generate your serial and choose offline activation
  6. Copy Your Installation Code into XF keygen and generate your Activation Code
    Copy it back into Corel Activation Window
Screenshots

Minimum System Requirements

  • Microsoft Windows 8/8.1 (64-bit editions), Windows 7 (64-bit editions), all with latest service packs installed
  • Intel Core 2 Duo or AMD Athlon 64
  • 2 GB RAM
  • 1 GB hard disk space (for installation without content)
  • Mouse, tablet or multi-touch screen
  • 1280 x 768 screen resolution
  • DVD drive (required for box installation)
  • Microsoft Internet Explorer 8 or higher
  • Download Corel Draw X7 - Click Here

  • Learn How to Install Corel Draw X7 - Click Here

  • Learn How to Download Anything from uTorrent - Click Here

Read More...

Bloggers: 6 Steps For The Perfect SEO Formula

Welcome back, Class. If you are expecting the easy, nothing-to-it type of list we covered in Article Writing: 6 Rules To Getting The Perfect Format, we are happy to disappoint. The 6 steps to the ideal SEO formula are the most difficult and just as important for the perfect articles and blog posts every single time.

With some major Google Panda updates, some of you may find it even more difficult to nail the right methods. There is nothing more powerful than or as riveting as an article or blog post with the perfect format and SEO formulas. Let’s explore the 6 steps for the right SEO formula.

Step 1: The Perfect Articles Or Posts Keyword

If you have been writing since the 1990s, you will still remember what it was like to write content around keyword density. It can be a hard habit to break. The Panda algorithm took keyword stuffing out of the equation a couple of years ago and I still catch myself worrying over how to stuff keywords and have to stop and remind myself not to do so.
Too many keywords can kill an article quicker than a bullet. Step One is easy. Stop worrying about keyword density and write original, free-flowing content.

Step 2: The Title

Keyword optimization still exists. The Panda is a wise old bear indeed. He knew that doing away with keyword density would alleviate the unoriginal content problem.

He also knew that keywords are the easiest way for a search engine to connect traffic to the websites they seek. Place your researched keyword in the title as close to the beginning as possible to help the search engines find your website or blog.

Step 3: Images Are Worth Much More Than A Thousand Words

The images tags are how a server reads and understands what a website’s images are all about. Servers do not see the images. All they can do is read the descriptions that are placed in the tags.
The wise placement of a keyword in your image alt tag is another way the search engines can find your content and bring you the traffic your perfect articles or blog posts deserve.

Step 4: Optimize H1

Your Header 1 is an excellent place to put a keyword simply because it is the one subtitle on the page that you know Google’s spider will crawl. It is also possible that it will crawl and index your H2 and H3 subtitles but it will definitely crawl your H1, so do not miss the opportunity to get your perfect articles or blog posts noticed.
Placing keywords in these areas takes a little planning. Think it through beforehand for the perfect content, header, and keyword optimization.

Step 5: The Ice Cream Sprinkles Dilemma

We learned quickly when we were children about the ice cream sprinkle effect on our cones and sundaes. Too many sprinkles are pretty, but they detract from the taste of the ice cream flavor. If we put too few sprinkles on our ice cream, we barely notice them at all and it defeats the purpose. We became sprinkle experts in a hurry. Thus it is… with keywords.

Too few keywords may as well be none and too many will cause Google to pass you by, which defeats the purpose. You have to get a feel for the perfect amount of keywords without worrying about saturation. That is like telling someone that the ship is sinking but not to worry about it because there are not enough lifeboats anyway. How can you not worry about something for which there is no clear answer?

Place a keyword in your title, a keyword in your H1 subtitle, a keyword in your perfect article’s or blog post’s first and last sentence, and of course, your images alt text. Once you have these 5 keywords in place, one in each paragraph or in every other paragraph are more than enough and not too many. As long as your five bases are covered, write naturally.

Step 6: Content Is King

We have learned about formatting and optimizing the perfect articles. The question is… are they really perfect? The answer lies in your content.
Once you have formatted and optimized your work, go back, read everything very slowly, and then ask yourself these 5 questions.
  1. Is it interesting?
  2. Is it informative?
  3. Does it answer all the questions that it raises?
  4. Does it have anything of value for the reader?
  5. Is it original?
If you can honestly say yes to all of the 5 questions above then congratulations are in order. You may have just recreated the SEO formula for the blog posts every single time.

Practice Makes Perfect

You may not be Stephen King, but you will be your client’s favorite content writer and well on your way to securing a reputation as a dynamite article and blog writer. So what are you waiting for? The perfect articles or blog posts takes practice.
Read More...

How To Turn On/Off Windows Action Center Message On Your PC

How often do you see this image when you are on Windows? It’s annoying, isn’t it? Every time you restart your PC that reminder comes on to nag you.
These messages are coming from the Action Center. The Action Center helps to scan your PC for security and maintenance issues, and it will alert you if necessary. If you have Windows Defender disabled, you will be repeatedly prompted to "Turn on virus protection". If you want to opt-out from receiving messages like this, this is the quick tip you should be reading.
Turn on virus protection

Turn Action Center Message On Or Off

To begin, start off by searching for Action Center on Windows 8 Metro search; click to open it. For Windows 7 users, go to Control Panel > System & Security > Action Center.
Search for action center
Next, click on Change Action Center settings at the left sidebar in the window. You will arrive at the Action Center settings page where you can choose the messages you don’t want to be prompted with.
Click On Change Action Center settings
To turn off Action Center messages, untick any of the options. If you do not wish to receive any further messages from Action Center, untick all of the options. Once done, click OK.
Change Action Center settings

Hide Icon And Notifications

Ultimately, you can also turn off all notifications from Action Center directly from the taskbar icon. To do that, click on the up arrow button at the taskbar and then click on Customize.
Click on Customize
Next, choose to Hide icon and notifications under the Behaviors tab in Action Center. Click OK and you’re done.
Hide icon and notifications
Read More...

How To Add New "Send To" Destination (Right Click) In Windows | Hacking Is Magic

When transferring files out of your computer in Windows 7 or 8, you will normally right click on the required file, then select the ‘Send to’ option. You can then send the file via Bluetooth, third-party services like Dropbox or Evernote among a few other destinations.
However, some of these destinations may not be what you need or even use at all. Wouldn’t it prefer to customize these destinations as you like?
intro image. send to with no new location
With a little tweak in Windows operating system you can add more locations to ‘Send to’ without the need of any external softwares.

Getting Started

To add more locations to the ‘Send to’ menu, search for ‘Run’ from the Windows Start Menu.
search and run run
In the box that pops up, type ‘shell:sendto’ and press Enter.
open send to folder
You will arrive at a folder where you can add in your choice of destinations. To add, just drag and drop the location icon or copy and paste the shortcut of the destination you want.
drag and drop new location in send to folder
Check to see if your destination as been added, just right-click on any file and hover over ‘Send to’.
new send to with charger card location in it
You can insert as many destinations as needed under the ‘Send to’ option.
Read More...

Automating Repetitive Windows Task With Folder Actions | Hacking Is Magic

Here’s the situation: you got back from an awesome vacation and want to organize your vacation photos but you have literally hundreds of photos to go through, renaming them,converting or compressing them and more. What if we told you that you don’t have to do everything single task on one file at a time.
On the Mac OS, there are built-in features to automate Folder Actions to help save time and reduce repetitive tasks. If you work on Windows, you can do the same with this tool called Folder Actions. Best of all, you can even carry out user-defined actions. Here is a walkthrough of the features of Folder Actions.

Getting Started

You can get started by downloading the software here. Don’t worry about how simple the site looks. The lack of a complicated design doesn’t diminish the purpose the site is there to serve.
Once you are done installing it, open Folder Actions and look for the + icon on the top left. Click on it to bring up a window where you can browse for the folder that you wish to use Folder Actions on.
.

Available Preset Actions

Once you have located your folder of files, here are some of the things you can do to the batch of files.
Rename Files: Renames files that are added into the folder. There is no batch rename support for now.
Convert Image Files: All your images can be converted to a different image format such as jpg, png, tif, gif and bmp with customized quality.
Convert Video Files: As for videos, conversions into MP4 iPhone, MP4 iPod, MP4 Blackberry, MP4 PSP, 3GP Mobile, FLV, AVI and MPEG are supported.
Convert Audio Files: You can convert your audio or video files into an audio format like mp3, wav and etc.
Compress or Decompress Files: Easily compress files into your chosen compress formats and automatically decompress any added compressed files in the folder. File formats supported for compression are .zip, .7z, .gzip, .tar. File formats supported for decompression are .zip, .7z, .rar, .arj.

User-Defined Actions

Apart from these preset actions you can enable more features through .bat files, or third-party scripts. For instance, here is an example where you can use an external script called Ghostscript to convert JPG files to PDF.

Advantages & Limitations

The good news is the tool is light on resources, even when converting/processing images or videos in the background. The software also has a very simple layout, and doesn’t require an Internet connection to work.
However, the number of things this tool can run is rather limited. Although you can solve that with the user-defined actions, not everyone is comfortable running .bat format files and scripts – a user-friendly UI would be better. Another thing is that while you can run two actions on the same folder (using the sub-folder feature), you will be prompted with an error message "File is in use" every time.

Conclusion

As you can see, users who have to do a lot of repetitive tasks on their laptop may find use for Folder Actions even though they will have to first find the script for that action. But don’t let that stop you from trying out the tool. Let us know how you like or dislike the app in the comments section.
Read More...

Bypass Windows Login Password with Trinity Rescue Kit | Hacking Is Magic

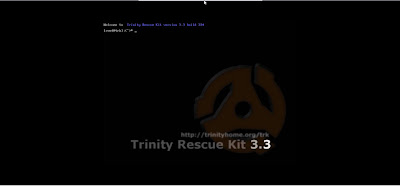
Trinity Rescue Kit (Click Here to Download) is use for to bypass the Login of windows platform windows 7, XP 2, XP 3 and all. Most systems that use a password authentication mechanism need to store these passwords ( or their hashes ) locally on the machine. This is true for Operation system  (Windows ,Linux,Cisco IOS) Network hardware ( Router, Switches) etc. Windows Stores local usernames in the SAM database ( Security Accounts Manager ) , as well as in other places .   
     The SAM file can be found in %SYSTEMROOT%\system32\config and is inaccessible for reading,copying or writing while Windows is running .  A backup copy of the SAM can usually be found in %SYSTEMROOT%\repairs. This file is not locked by the OS and can be accessed given sufficient privileges.

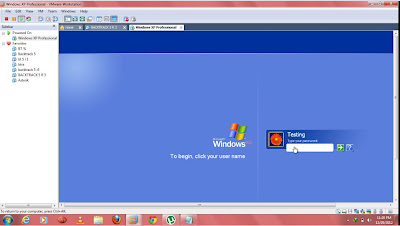
Step 1 :- Check the Username of Target Machine

(Click on Image for Larger Preview)

Username is Testing

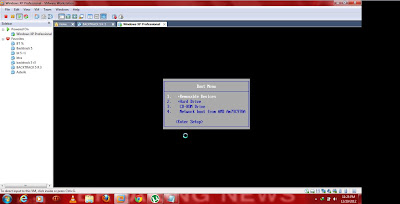
Step 2 :- Boot the Trinity Rescue Kit CD or Bootable Pen Drive

(Click on Image for Larger Preview)

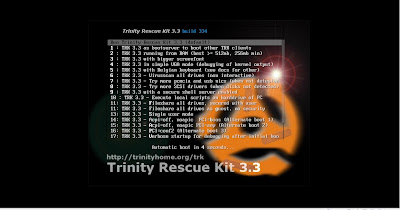
Step 3 :- After Booting Press default option (Run Trinity Rescue Kit Default)

(Click on Image for Larger Preview)

Step 4 :- Wait for Shell

(Click on Image for Larger Preview)

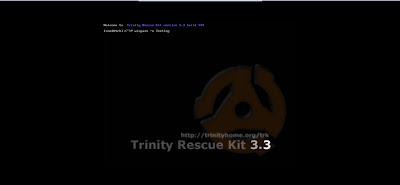
Step 5 :- Use command : winpass -u Username then Enter

Here my Username is Testing

Command:  winpass -u Testing

(Click on Image for Larger Preview)

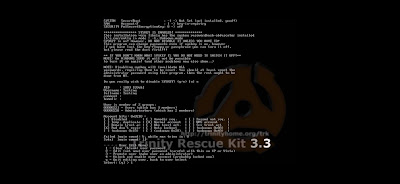
Step 6 :- After command it ask to make for Choice there are Two options [q] -quit and [1] -contin

(Click on Image for Larger Preview)

Step 7 :- Now after Press 1 it will show again 5 more Options 

1. Clear    2. Edit    3. Promote Use    4. Unlock    5. Quit

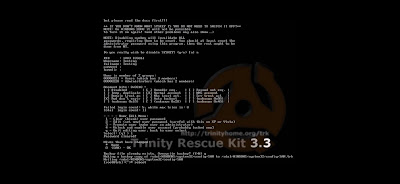
Press 1. for Clear the SAM File

(Click on Image for Larger Preview)

Step 8 :- SAM file is clear now, Reboot & it will Automatically Starts the Windows 

(Click on Image for Larger Preview)

Step 8 :- Finally you Bypass the Login Successfully

(Click on Image for Larger Preview)

This Post is Submitted by Rahul Singh ( www.rmar.in )  |  Join him on Facebook 
Read More...

How To Add Shortcuts To ‘My Computer’ On Windows 7 & 8 | Hacking Is Magic

The ‘My Computer’ icon gives us easy access to our hard drives (or SSD), removable flash drives and other network-related locations. But if you’re one who enjoys a clutter-free desktop, then maybe you can use this tweak to remove the many program and folder shortcuts on your desktop.

Here’s a way to get more usefulness out of ”My Computer” by adding the shortcuts that you need to it. This also gives you quick access to the program or folder and works very well with Windows Explorer tabs tweak like Clover. Here’s how you can add shortcuts to your ”My Computer” in a few easy clicks.


Adding Program Shortcut to 'My Computer'

First you’ll have to navigate to a special folder. Shortcuts placed in this folder will be displayed on ‘My Computer’.

Hit Windows Key + R  and type in %appdata% into the box and click on OK.


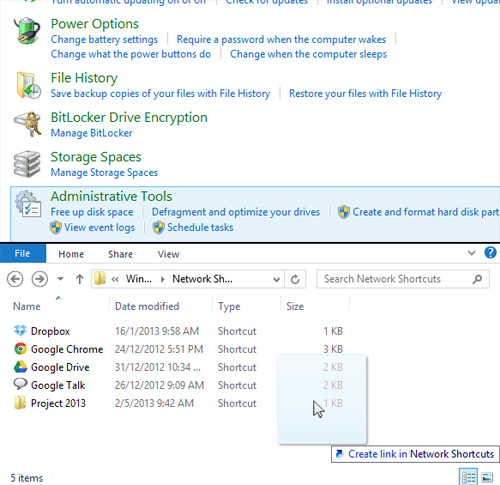
Then navigate to Microsoft > Windows > Network Shortcuts. Program shortcuts that you place here will be shown on ‘My Computer’, it’s that simple.


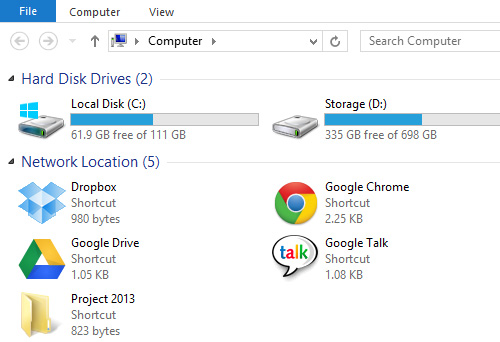
Once you have placed program shortcuts into that folder, you’ll be able to see the shortcut icons on ‘My Computer’.

Adding Folder Shortcuts to 'My Computer'

Because you can add any shortcut, you can also add folder shortcuts. To easily do that, just right click on your frequently used folder and click on Create Shortcut.


Now all you have to do is cut (Ctrl + X) the created shortcut and paste (Ctrl + V) into the Network Shortcuts folder, like how we transferred the program shortcuts earlier.

Adding Control Panel Shortcuts Shortcuts

You can also have quick access to frequently used Control Panel shortcuts on your ‘My Computer’. All you have to do is simply click and drag something from the Control Panel to the Network Shortcuts folder.


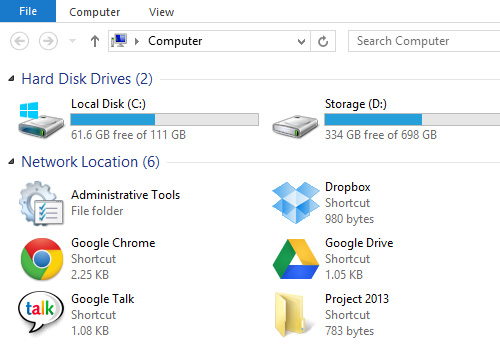
Here’s the final result of adding all these shortcuts.


Now your ‘My Computer’ will be well equipped with all your frequently used shortcuts and quick access links.
Read More...

Bringing Back Windows 8 Start Menu | Hacking Is Magic

The brand new Windows 8 is out and one key feature removed from the new OS is the Start Button; that iconic "Click here to Start" has been replaced with the new customizable Metro UI. Because of the Start Button’s absence, programmers have come up with many replacements to mimic the old Start Button. 
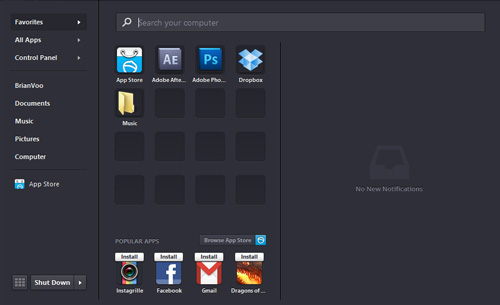
             Today, we’ve found a free program called Pokki which brings back the Start Menu to Windows 8. If you’re imagining the standard Start Menu where all you get is the list of installed programs, then you’ll be surprised to see that Pokki has many other features and apps that work within its version of the Start Menu, despite not diverting from taking the place of the old Start Menu we so loved.

Windows 8 Start Menu with Added Features

First of all, download and install Pokki. What is good about Pokki is that it is not ‘hardwired’ into the OS which means you can easily install and start using it without restarting your computer.


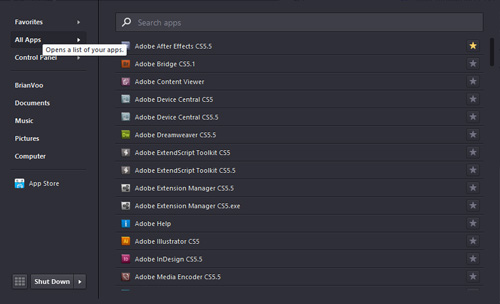
You can view all the installed programs on your computer when you click on the All Apps tab. You can also click on the Star icon to mark that program as a ‘ favorite’.


A starred program will appear in the 4-by-4 grid when you first hit the start button or the windows key. You can also ‘ favorite’ folders and websites that will be displayed here.


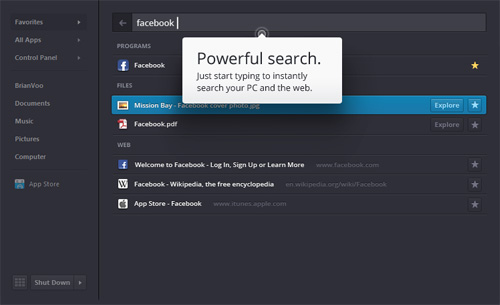
The search bar works the same way; you can immediately start typing the moment the Start Menu is shown. However, the Pokki search is also much more powerful as it can retrieve results for files, programs and even from the Internet.

Pokki App Store

Pokki also has an App Store where you can install apps like Facebook, Twitter, Gmail, games and much more.

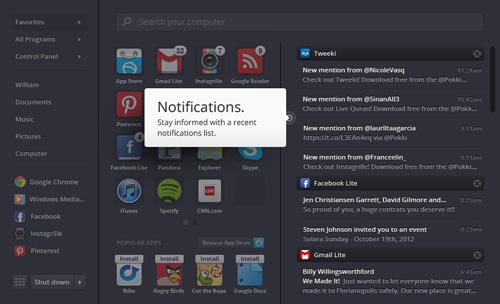
Once you install an app, the app icon will be shown on the taskbar, together with your ‘ favorite programs. You can remove icons by right clicking on them.


When opening one of the installed Pokki Apps, it will open in a new window. This is the same for apps like Facebook and Gmail which works like a web browser.


What’s awesome is that the apps work similar to your smartphone where you have real-time notifications and number badges on the icons.


With these few added features, Pokki makes a great Windows 8 Start Menu replacement. Do give it a try and let us know if you agree.

Read More...

Turbo C & C++ For Windows 32bit & 64bit Full Screen | Hacking Is Magic

Many Schools , Institutes, Colleges and Learning Centers still use turbo c++ software to teach c language. But when it comes to newer operating systems like Windows vista and windows 7 it won’t support. Reason is turbo c++ is 16 bit compiler and it runs perfect on old operating system like xp but having some compatibility issue with windows vista and 7.  There are many other compilers available for C language. But most of the student use TC due to their curriculum.

 We can use DosBox to run TC on Win vista and 7. But it is not fully supportable. We could not run graphic code and also it won’t work with 64 bit os. So we cannot able to work tc in newer operating systems. So here is solution for that, with the help of Emulated Turbo C++ IDE 3.0 software. Now we can work on Turbo C fine in win vista and 7 64 bit. Emulated Turbo C++ IDE 3.0 design in a way that we don’t need to configure anything and it is one click installer.


This software is designed to create an 16Bit environment on a 32 Or 64Bit machine. As 16 Bit environment is created, it allows to use any application designed for the architecture. Emulator has been designed especially for turbo c++ and thus ensures its smooth functioning.


Hacking Is Magic, Download Button, Red Download Button, Rectangle Download Button

Installation of this software is easy just follow the instructions. It’s like next-next-finish.

Now open the Emulated Turbo C++ from desktop shortcut. Enjoy
Read More...

How to Hide Any Drive Using Command Prompt in Windows OS

Have you ever thought of hiding any drive from your system so that no one can knew about it. You may have heard or even used a lot of software’s that might be able to do that, but if you are ENTHUSIAST like us and want to do things by your own without using any 3rd Party Software than this tutorial will show you how you can do it.

Well in this tutorial we are covering Command Prompt way of doing it.

You can hide the command Prompt using command prompt. 

What is the use?
Hide your important Personal drive.  So whenever third person or your friend uses your computer, they won't know there is known hidden drive.  So you can hide a file from a third person.

How to do?
Just follow my steps to hide the drive.

Step 1. Open command Prompt, go to Start Menu > All Programs >Accessories > Command prompt or Press window +r and type cmd > Enter

Step 2. In the Command Prompt, type Diskpart and hit enter key. If UAC (User Account Control), dialog-box prompts than click Yes.

Step 3. Then type List Volume and press enter, this will produce the list of all drives.


Step 4. Now select the drive which you want to hide, you can either do this by typing Select Volume 1 (i.e. Volume Number) or by typing Select Volume C (i.e. Drive letter)


Step 5. To hide a drive, type Remove Letter C. Here, C is the drive letter than you want to hide. You can use any drive letter you want.


Step 6. That’s it. You are done! C drive is now hidden


How to Unhide Hidden Drive

Step 1. Follow the procedure mentioned in step 1, 2, 3 and 4.

Step 2. To show the hidden drive type Assign Letter C and hit enter, now you can view C: drive in explorer.

That’s it. This is one way of hiding and un-hiding drives from explorer.
Read More...